
FacadeDirectory Media & Content Guide
Taking the time to set up your FacadeDirectory profile properly from the start ensures your business presents itself professionally and efficiently. From company description to file formats and brand consistency, this guide outlines how to optimise your listing for discoverability and impact.
A well-structured directory page does more than look good—it builds trust, streamlines communication, and attracts opportunities.
Step 1: Business Name Must Be Unique
✅ Do: Use distinct, brand-specific names
Example:
Fixing Smiths Co
❌ Avoid: Generic words or short names
Example:
Bolts ltd / Panels uk
A unique name reduces false matches and improves discoverability.
Step 2: Maintain Proper Spacing Around Your Name
✅ Good:
“We recently partnered with Fixing Smiths Co on a Derbyshire cladding project.”
❌ Avoid:
“FixingSmithsCo’s solution…”
“Check@FixingSmithsCo”
Always place the name on its own line or sentence, with standard punctuation.
Step 3: Choose the Right Categories
Correct categorisation ensures your company is found in relevant filters and search results.
Examples of categories:
-
Fixing Supplier
-
Fixings Manufacturer
-
Cladding Installer
-
Facade Designer
Add multiple if they apply to your business.
Company Description (Text Only)
Your company’s profile should describe:
What you do (e.g., “fixing solutions for façades”)
Industry experience or specialisation
Key differentiators (certifications, innovation, UK-made, etc.)
✅ Avoid putting images or logos inside the text box
✅ Use short paragraphs for clarity
✅ Recommended length minimum of 120 characters and a maximum of 800 characters.
Brand Assets Guide
Logo Requirements
Dimensions: 500 x 500 px
Format: PNG or SVG (transparent background preferred)
Aspect Ratio: 1:1 (square)
File Size: Max 1MB
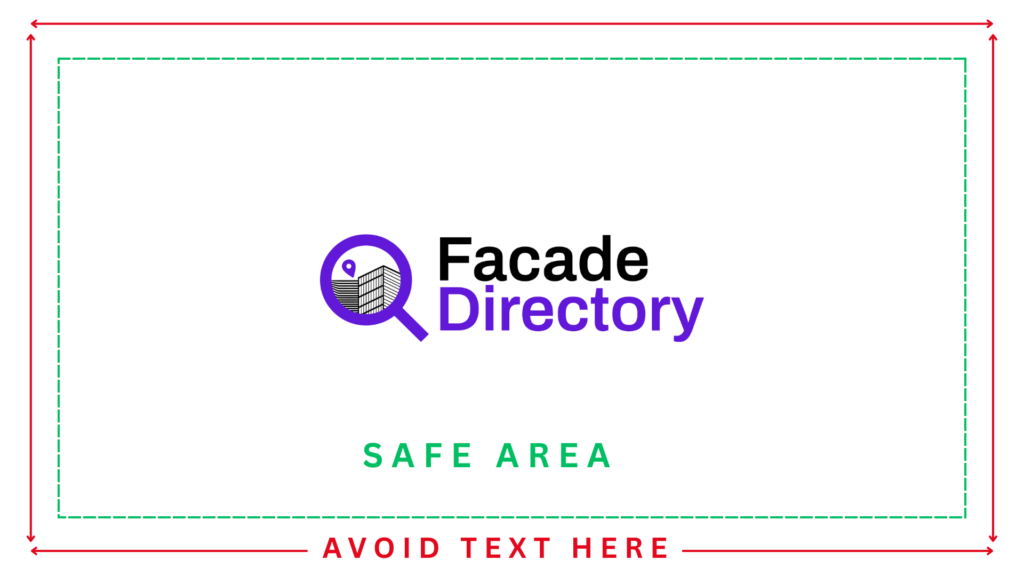
Cover Image Requirements
Dimensions: 1920 x 1080 px
Format: JPG or PNG
Aspect Ratio: 16:9 (landscape)
Avoid text overlays inside the image
Keep your logo, text, or focal point inside the “safe area”:
Safe Area: 1920 x 1080 px centered — avoid placing key elements at the extreme edges to prevent cropping on mobile views.
Document Upload Guidelines
File Format:
-
PDF only
File Naming Protocol:
All documents must be clearly named using this format:
[Company Initials]_[Document Type]_[Optional_ProjectOrProductName].pdf
Examples:
-
FSC_Technical_Datasheet.pdf -
FSC_ISO_9001_CERTIFICATE.pdf -
FSC_Product_Brochure_2025.pdf
Consistency helps users understand and download the right files quickly.
Image Gallery Best Practices
File Format:
- PNG or JPEG
- Suggested Aspect Ratio: 4:3 or 1:1
- Optimize and compress File Size
- Maximum 6 images can be uploaded
- Ensure all images are copyright-cleared and captioned if necessary.
Add Brochures ,Technical sheets , Project summaries , Certifications , Product updates
Make sure all documents are under 10MB, accessible, and follow the naming protocol.
Tips:
- Show product detail (e.g., bolts, brackets, anchor systems)
- No text or logos over the image
- Use real project photos or studio-quality shots
Video Submissions
We accept links to:
YouTube
Dropbox / Google Drive (public access only)
Format: MP4 preferred
Duration: Under 3 minutes for promotional content, under 8 minutes for case studies.
Please include a short description and a video title.
Contact Section Must-Haves
Be sure your contact panel is filled in correctly:
- Website link (starts with https://)
- Active email form or clickable address
- Optional: add a short CTA like “Request a quote” or “Book consultation”
Best Practices and Final Checklist
- Keep your listings updated every 2 to 3 months
- Update brochures, ISO certificates, and project overviews regularly
- Use consistent language and naming across your files and visuals
- Consider creating separate directories for:
- Partner brands
- Regional divisions
- Product lines (e.g., “Smiths Brackets” vs. “Smiths Screws”)
✅ Final Checklist Before You Submit
- Text is editable and clean
- Images are high-res and properly named
- Video links are working
- PDF files follow naming protocol
- Logo and cover image attached
